Grades: 9-12 (Science, Chemistry and Biology)
Time: 60 minutes
Space Requirement: Classroom with sink and ample counter space
Methodology: Hands-on, Cooperative and Independent Learning
Materials not included in the kit:
For each group: Two 250mL beakers, dechlorinated water prepared in Lesson One, a watch or timer, tape and a marker, stir stick, coffee filter
For the Teacher: Small amount of chlorine bleach, beaker (at least 100mL), 100mL of dechlorinated water from one of the group’s dechlorination bottles, a coffee filter, a watch or timer
Materials included in the kit that will be used:
For each group: 4 total chlorine test strips, 3 free chlorine test strips, 3 ammonia test strips and 3 disposable beakers, ammonia test colour chart, 2 plastic cups, empty 5mL vial, 5mL vial of ammonia solution
For the Teacher: Pipette
Objectives: Students will learn more about chemical reactions involved in the water treatment process by participating in an experiment examining these reactions. Students will collect and analyze experimental data on chemical reactions. Students will be able to demonstrate calculations involving concentrations, volumes and dilution factors.
Directions/Procedure:
Immediately before the class, prepare a chlorine solution with a concentration of about 0.8mg/L. This can be done by following the directions in the “For the Teacher” section below. Note that you will be using water from one of the dechlorination bottles this time. This will take about two minutes.
If you are planning to use other containers as beakers in this lesson be sure that they are calibrated using the directions in the “For the Teacher” section below.
Distribute printed copies of the Lesson Four Handout to the class.
Explain the experiment to the class. Let them know that it is very much like the experiment described in the example from the previous lesson.
Separate the materials listed for this activity from the rest of the kit and have someone from each group collect what they need.
With this experiment it might be beneficial to lead the class through each step rather than just giving them the instructions and letting them go. You could have each group do each step at the same time and ask that no one move ahead until everyone has completed the step before. This will allow you to address questions and problems with each step at once and not have to worry about the confusion caused by each group being on different steps. If doing it this way you could also lead the tests with a watch or timer. You could announce the moment that every group should put their test strip in the sample, time the test, then announce when the time is up.
Ask each group to work through the procedure of the Chloramine Experiment. When they reach step 12 the students are instructed to use their empty 5mL vials to collect 5mL of the chlorine solution you prepared. You can either allow the students to pour their own sample from the beaker into their vials or do it for them.
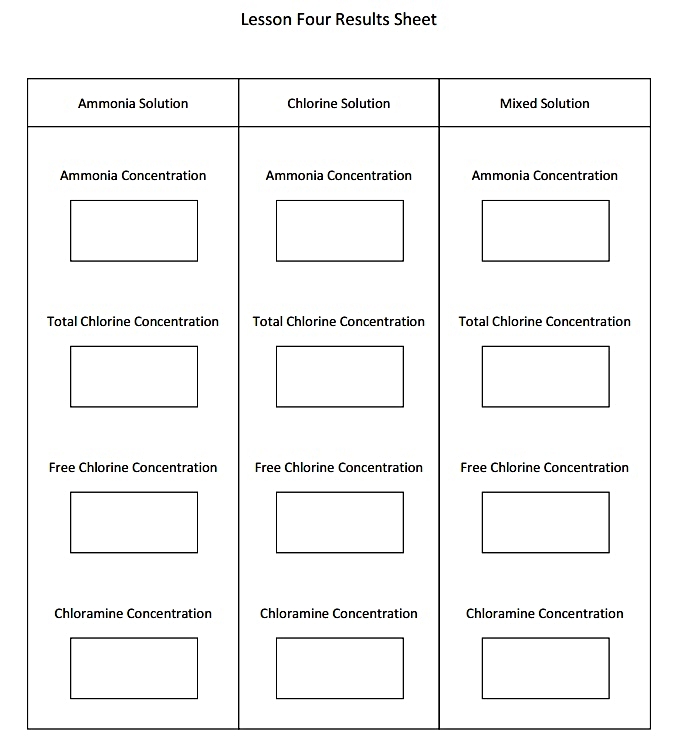
Make sure every group has all of their test results (ammonia, total chlorine and free chlorine for each of the ammonia solution, chlorine solution and mixed solution for a total of 9). At this point things can be cleaned up, the ammonia, chlorine and chloramine solutions are all very dilute and can safely be disposed of in a sink.
With any remaining class time students can begin thinking about the questions at the end of the handout. You can have them work on these individually or in groups and can be assigned for homework. Students should have answered these questions and be ready to discus them in the next lesson. A guide to these questions can be found in the “For the Teacher” section of both this lesson plan and the one for Lesson 5.
Evaluation: Students can be evaluated on participation in the experimental procedure. Students can be evaluated based on their completion of the questions at the end of the handout. Students should demonstrate an understanding of the experiment they have performed, an understanding of how concentration measurements work and a proper use of units in calculations.
For the Teacher:
Preparing the Chlorine Solution
Fold a coffee filter into a cone and hold it in place over a 100mL beaker (to make things easier you can put the filter in a funnel). From one of the dechlorination bottles prepared by the students pour 100mL of water through the filter into the beaker. You will need some chlorine bleach (look for 4% sodium hypochlorite on the label). Using the pipette put 4 drops (about 0.12mL) of bleach into the beaker then mix this solution. Each group will need 5mL of this solution which they will be diluting further.
Calibrating Another Container to be used as a Beaker:
The container should be calibrated with 100mL, 200mL and 250mL marks using a graduated cylinder. You can do this by filling a graduated cylinder with 100mL of water and then pouring this water into your other container and marking the water level with a marker. Pour this water out and then fill the graduated cylinder with 200mL of water. Pour this into your other container and mark the 200mL level. Repeat this once more with 250mL.
Answer Key for the questions on the Lesson Four Handout
1. The chloramine concentrations can be found by subtracting the free chlorine concentrations from the total chlorine concentrations.
2. Since the two solutions are being mixed 50/50 the concentration of each chemical in the mixed solution will initially (due to dilution before chemical reaction happens) be the average of the values in the two separate solutions as was demonstrated in the salt and sugar example. For example, if the chlorine solution had a total chlorine concentration of 0.8mg/L and the ammonia solution had a total chlorine concentration of 0.1mg/L then the computation the students would have to perform is as follows:
0.8 mg/L * 100 mL + 0.1mg/L * 100 mL = 0.09mg total chlorine in the mixed solution
0.09mg / 200mL = 0.45mg/L total chlorine in the mixed solution
Or simply
(0.8mg/L + 0.1mg/L) / 2 = 0.45mg/L
Students are expected to do four such calculations, one each for ammonia, total chlorine, free chlorine and chloramine.
Students should understand that it is the difference between these calculated concentrations and the experimentally found concentrations of the mixed solution that indicate the results of the chemical reaction and NOT the difference between the experimentally found concentrations of the unmixed solutions and mixed solution.
For example if the chlorine solution had a free chlorine concentration of 0.8mg/L, the ammonia solution had a free chlorine concentration of 0.0mg/L and the mixed solution had a free chlorine concentration of 0.0mg/L then students may be tempted to say that the chemical reaction reduced the free chlorine concentration from 0.8mg/L to 0.0mg/L. What has really happened is that the free chlorine concentration was reduced to 0.4mg/L by the dilution and then further to 0.0mg/L by the chemical reaction in separate processes.
3.
a) The expected answer is “no”, some of the experimental results should be very close to the results found in question 2.
b) It is expected that the calculated concentrations of ammonia and total chlorine will be very close to the students’ actual experimental findings. This does not, however, mean that ammonia and total chlorine were not involved in the reaction. They are, of course, very important reactants.
c) The ammonia concentration may appear to have been unaffected because its actual change would have been very small, far too small to notice with the available test. This is the case because far more chlorine is used in this reaction than ammonia. Remember that it takes about 10-15 mg of chlorine to react with 1 mg of ammonia. The total chlorine concentrations may be unaffected because, as the free chlorine is turned into chloramine, the sum, free chlorine + chloramine, should be constant. It is expected that the calculated concentrations of free chlorine and chloramine will be quite different from the experimental results. The free chlorine concentration should drop sharply since it is used in the reaction with the ammonia. The chloramine concentration should increase accordingly since it is created in the reaction.
4. It is up to the students to decide if they believe their experimental results agree with the assumptions or not. They should be expected to be able to support and explain their answer. Ask students to compare the apparent amounts of free chlorine and ammonia that their experimental results indicate were used in the reaction. Ask students to compare the apparent increase in chloramine concentration with the decrease in free chlorine concentration.
Operation Water Biology
Lesson Four
Ammonia and Chloramine Part Two
In this experiment you will combine an ammonia solution with a chlorine solution in the same way that was described in Lesson 3. You will test the two samples separately to find their individual ammonia, free chlorine and total chlorine concentrations. 100mL of each will then be poured together to see if a reaction resulting in the production of chloramine really takes place.
To make sure that there are no extra, unwanted reactions taking place and to control as many variables as possible, the solutions will be mixed using some of your dechlorinated water.
Materials needed for this experiment are:
Four total chlorine test strips and three free chlorine test strips
Three ammonia test strips
Ammonia colour matching chart and three disposable beakers
Two plastic cups
Two 250mL beakers
Empty 5mL vial
5mL ammonia solution vial
Coffee filter
Dechlorination bottle prepared in Lesson One
Watch or timer
Tape and marker
Stir stick
First you can find out how much chlorine the GAC was able to remove from your tap water.

1. You will be using a coffee filter to separate the GAC out of the water. The easiest way to do this is by folding the filter into a cone. Begin by folding the filter in half and then half again so it is in the shape shown in Figure 1 to the right. Looking at the filter from above, you should see four edges of the filter like in Figure 2. You can pull three of these edges in one direction and the forth in the other direction to open the filter into a cone shape.
2. Hold the coffee filter in place over a plastic cup. Open the dechlorination bottle and slowly pour some of the water through the filter until the cup is about half full. This filter will be used again in step 5.
3. Perform a total chlorine concentration test on this sample.
Total Chlorine concentration of tap water after exposure to GAC:
___________________________________________________
4. Find the difference between the chlorine concentrations in the regular tap water that you tested in the first lesson and this water that has been exposed to the GAC.
Amount that the GAC lowered the tap water's total chlorine concentration
___________________________________________________
Now begins the ammonia / chloramine experiment
5. Fold your coffee filter into a cone and hold it in place over one of the beakers.
6. Slowly pour water from your dechlorination bottle through the coffee filter until the beaker is full to the 250mL mark. Move the filter to the second beaker and fill it to 250mL as well.
7. Label one beaker as "Ammonia" and the other as "Chlorine".
8. Pour the contents of the 5mL ammonia vial into the ammonia beaker.
9. Swirl the beaker so that the ammonia solution will be well mixed. If you want to use an object to stir the solution use a clean stir stick, not a pen, pencil, finger or anything else.
All results from these tests should be recorded in the space provided in the chart at the end of this lesson.
10. Perform the Ammonia Test on this sample by following the provided procedure.
11. Pour about 50mL of your diluted ammonia solution into a cup and perform a total chlorine concentration test. Empty and rinse the cup, pour another 50mL of your diluted ammonia solution sample into the same cup and do the Free Chlorine Test. Empty and rinse the cup again.
12. Use the 5mL vial (not the one that the ammonia came in) to get 5mL of the chlorine solution that has been prepared by the teacher.
13. Pour this sample into the chlorine beaker and swirl it to mix the solution. If you want to use an object to stir the solution use a clean stir stick, not a pen, pencil, finger or anything else.
14. Do all three tests on this chlorine sample in the same way you did for the ammonia sample. Use the second cup for the chlorine tests of this sample.
15. Pour some of the water out of the ammonia beaker until you have 100mL left in the beaker. You may want to pour the water into a cup so that if you pour too much you can put some back.
16. Pour some of the water out of the chlorine beaker until you have 100mL left. You may want to pour it into the other cup so that if you pour too much you can put some back.
All results from these tests should be recorded in the space provided in the chart at the end of this lesson.
17. Pour your 100 ml chlorine solution into the ammonia beaker so that there is 200 ml in this beaker. Swirl this solution a bit to mix it, if you want to use an object to stir the solution use a clean stir stick, not a pen, pencil, finger or anything else.
18. Do all three of the tests on this mixed sample. Either of the cups can be used for the chlorine tests.
Questions on the Lesson 4 Handout
1. When you have all nine of your test results calculate the chloramine concentrations of each of the three solutions tested. Remember that you can do this by subtracting the free chlorine concentration from the total chlorine concentration. Record these values in the spaces provided.
2. Calculate the concentrations of all four chemicals that would have been in the mixed solution after pouring together the chlorine and ammonia solutions but before the chemical reaction started (just like the salt and sugar example). The differences between these calculated values and the actual concentrations you found experimentally are due to the chemical reaction.
3.
a. Did the chemical reaction appear to change the concentration of all four of the chemicals you tested for?
b. Did any of your calculated concentrations from question 2 match, or almost match, the actual experimental results? If so, does this mean that these things were not involved in the chemical reaction? How might you explain this?
c. Were any of your calculated concentrations from question 2 very different from the actual experimental results? What does this mean?
4. In the Lesson 3 questions we made two assumptions. First we assumed that a free chlorine concentration of 10 mg/L is exactly enough to react with 1 mg/L ammonia and secondly we assumed that all of the free chlorine used in the reaction becomes chloramine. Do you think your experimental results confirm these assumptions? Why or why not?